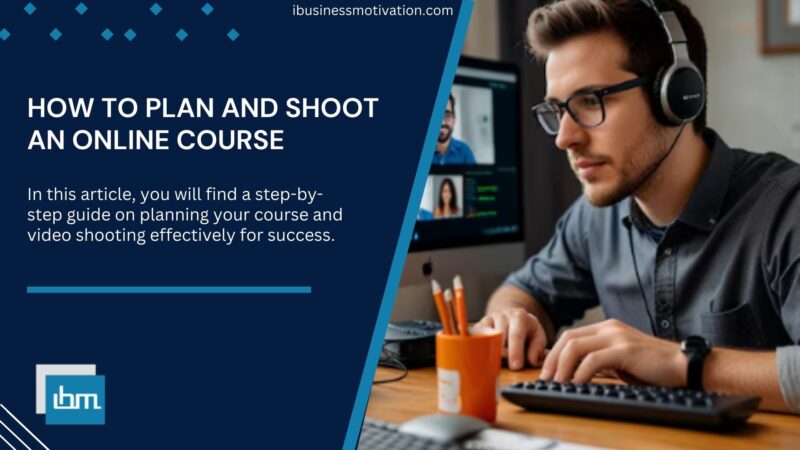


How to Plan and Shoot an Online Course. Online learning continues to grow exponentially, making it a prime opportunity for educators, entrepreneurs, and professionals to share their expertise.
With the demand for high-quality online courses increasing, it’s more important than ever to create videos that are not only informative but also engaging and professional.
In this guide, we’ll walk you through the entire process of planning, shooting, and editing your online course video in 2025.
From understanding your audience to choosing the right equipment and setting up a studio, we’ve got you covered.
By the end of this guide, you’ll have all the tools and knowledge you need to produce a course that stands out in the competitive online learning market.
How to Plan and Shoot an Online Course?
Before you even think about picking up a camera, it’s crucial to understand who you’re teaching. Your audience will dictate every aspect of your course, from the content you cover to the way you present it.
1. Know Your Audience.
Identifying Your Target Audience.
- Define the Demographics: Age, gender, occupation, and education level.
- Determine the Skill Level: Are your students beginners, intermediates, or advanced learners?
- Identify Their Pain Points: What problems or challenges are they facing that your course can solve?
Researching Audience Needs and Preferences.
- Survey Potential Students: Use surveys or polls to gather direct feedback.
- Analyze Competitor Courses: Look at similar courses and see what works and what doesn’t.
- Use Social Media Insights: Platforms like LinkedIn and Twitter can provide valuable data on what your target audience is talking about.
Tailoring Content to Audience Skill Level.
- For Beginners: Simplify concepts and provide foundational knowledge.
- For Intermediate Learners: Build on existing knowledge with more complex ideas.
- For Advanced Learners: Focus on specialized topics and advanced techniques.
2. Course Content Planning.
Planning your content is the backbone of your course. A well-structured course ensures that your students can easily follow along and gain the knowledge they signed up for.
Defining Course Objectives
- Clear Goals: What should students be able to do after completing your course?
- Measurable Outcomes: How will you measure success?
Outlining Course Modules and Lessons
- Modular Structure: Break your course into modules, each focusing on a specific topic.
- Lesson Breakdown: Within each module, create individual lessons that progressively build on one another.
Creating Detailed Lesson Plans
- Content Overview: What topics will be covered in each lesson?
- Time Allocation: How much time will you spend on each topic?
- Activities and Assessments: What exercises or quizzes will reinforce learning?
3. Scriptwriting for Online Courses.
Importance of a Well-Written Script
A well-crafted script is the foundation of a successful online course. It ensures that your content is clear, concise, and engaging, helping you communicate your message effectively to your audience. A good script also keeps you on track during filming, reducing the need for multiple takes and extensive editing.
Steps to Writing a Compelling Script
- Start with an Outline: Begin by outlining the key points you want to cover in each lesson. This will help you organize your thoughts and ensure that your content flows logically.
- Write a Rough Draft: Don’t worry about perfection in the first draft. Focus on getting your ideas down on paper. You can refine the language and structure later.
- Incorporate Storytelling: Engage your audience by incorporating storytelling elements. Use real-life examples, case studies, or hypothetical scenarios to illustrate key concepts.
- Keep it Conversational: Write your script in a conversational tone. Imagine you’re speaking directly to a student, making the content more relatable and easier to understand.
- Include Calls to Action: Encourage students to apply what they’ve learned with prompts like “Pause the video and try this exercise” or “Download the worksheet and follow along.”
Using Conversational Language.
Using a conversational tone in your script helps bridge the gap between you and your students. It makes your content feel more personal and engaging. Avoid overly formal language and jargon unless it’s necessary for the subject matter. Instead, aim for a tone that’s friendly, approachable, and easy to follow.
Incorporating Engagement Techniques.
To keep your students engaged, incorporate various techniques into your script:
- Ask Rhetorical Questions: Pose questions that make students think and reflect on the content.
- Use Visual Aids: Refer to visuals like slides, diagrams, or on-screen text to reinforce key points.
- Encourage Interaction: Prompt students to leave comments, answer polls, or participate in discussion forums.
Script Review and Revisions.
Once you’ve written your script, it’s crucial to review and revise it:
- Read Aloud: Reading your script aloud helps you catch awkward phrasing and ensures the content sounds natural.
- Get Feedback: Share your script with colleagues or trusted individuals for feedback. They might spot areas for improvement that you missed.
- Revise for Clarity: Simplify complex ideas and remove any unnecessary filler content. Aim for clarity and brevity.
4. Selecting the Best Equipment.
Cameras for Online Course Videos
Your camera is one of the most important tools in producing high-quality online course videos. Here are some options to consider:
- DSLR/Mirrorless Cameras: These provide excellent video quality and flexibility. Popular models include the Canon EOS R series and Sony A7 series.
- Webcams: If you’re on a budget or want a simpler setup, high-end webcams like the Logitech Brio offer good video quality for online courses.
- Smartphones: Modern smartphones like the iPhone 14 or Samsung Galaxy S23 have excellent cameras capable of shooting professional-quality video.
Microphones and Audio Equipment
Clear audio is essential for online courses. Here are some microphone options:
- Lavalier Microphones: These clip-on mics are discreet and great for recording clear audio while keeping your hands free. Popular models include the Rode Lavalier GO and Sennheiser ME 2.
- USB Condenser Microphones: Ideal for desktop setups, USB mics like the Blue Yeti or Audio-Technica AT2020 provide excellent sound quality and are easy to set up.
- Shotgun Microphones: These are perfect for capturing directional sound, making them ideal for recording in less-than-ideal environments. The Rode VideoMic Pro+ is a popular choice.
Lighting Setup
Good lighting can make a huge difference in the quality of your videos. Here are some lighting setups to consider:
- Softbox Lights: These provide soft, even lighting and are a staple in video production. The Neewer Softbox Kit is an affordable option.
- Ring Lights: Ideal for close-up shots, ring lights provide flattering lighting with minimal shadows. The Neewer 18” Ring Light Kit is popular among content creators.
- LED Panel Lights: These are versatile and can be adjusted for brightness and color temperature. The GVM 560 LED Light Kit is a great option for online course creators.
Backgrounds and Props.
Your background sets the tone for your videos and can either enhance or detract from your content:
- Neutral Backgrounds: A plain wall or backdrop can keep the focus on you and your content. Consider using a fabric backdrop or a paper roll background in neutral colors like gray or white.
- Themed Backgrounds: Depending on your course content, you might want a more thematic background. For example, if you’re teaching a course on photography, consider having some of your work displayed behind you.
- Props: Props can be a great way to illustrate concepts. Just make sure they’re relevant and don’t clutter your shot.
Essential Accessories
Here are some accessories that can help improve your video production:
- Tripods: A stable tripod is essential for keeping your camera steady. The Manfrotto Compact Action Tripod is a reliable and affordable option.
- Stabilizers: If you plan to include any moving shots, a stabilizer like the DJI Ronin-S can help you capture smooth footage.
- Teleprompters: If you’re using a script, a teleprompter like the Parrot Teleprompter can help you maintain eye contact with the camera while reading your lines.
5. Setting Up Your Shooting Environment.

Choosing the Right Location
The location you choose for shooting your online course videos can have a significant impact on the final product:
- Home Studio: A dedicated space in your home can be ideal for filming. Look for a quiet room with minimal background noise and plenty of space for your equipment.
- Office or Studio Space: If your budget allows, consider renting a professional studio or office space. This can give you more control over the environment and reduce the risk of interruptions.
- Outdoor Locations: If your course content benefits from an outdoor setting, make sure to choose a quiet location with good natural light.
Setting Up a Home Studio
Creating a home studio doesn’t have to be expensive or complicated. Here’s how you can set one up:
- Choose the Right Room: Look for a room with minimal echo and natural light. If possible, choose a space that’s away from noisy areas like kitchens or busy streets.
- Soundproofing: To reduce background noise, consider adding soundproofing materials like foam panels or thick curtains. Rugs and carpets can also help absorb sound.
- Lighting: Position your lighting to eliminate shadows and ensure that your face is well-lit. Use softbox lights or ring lights to create even, flattering lighting.
Soundproofing Tips
Soundproofing is essential to ensure that your audio is clear and free from distractions:
- Acoustic Foam Panels: These panels can be mounted on walls to absorb sound and reduce echo.
- Door Seals and Draft Stoppers: These can help block noise from entering the room through gaps around doors.
- Thick Curtains: Heavy curtains can help block outside noise, especially if you’re filming near windows.
Lighting Setup for a Professional Look
Lighting is one of the most important factors in achieving a professional look for your videos:
- Three-Point Lighting: This is a standard lighting setup that uses three lights—a key light, fill light, and backlight—to create balanced and flattering lighting.
- Key Light: The main light source, typically placed in front of you and to the side. It should be the brightest of the three lights.
- Fill Light: A softer light placed opposite the key light to fill in shadows on your face.
- Backlight: Placed behind you to create separation between you and the background, adding depth to the shot.
6. Technical Aspects of Shooting.
Camera Settings (Resolution, Frame Rate, etc.)
To achieve the best video quality, it’s important to understand and optimize your camera settings:
- Resolution: Shoot in at least 1080p (Full HD) for a professional-looking video. If your camera supports it, 4K resolution can future-proof your content and offer more flexibility in post-production.
- Frame Rate: A frame rate of 24 or 30 frames per second (fps) is standard for most online videos. If you plan to include slow-motion shots, consider shooting at 60 fps.
- White Balance: Set your white balance manually to ensure accurate colors. This is especially important if you’re using artificial lighting.
- ISO: Keep your ISO as low as possible to avoid grainy footage. If you’re shooting in low light, use additional lighting instead of increasing the ISO.
Audio Settings and Considerations
Audio quality is just as important as video quality, if not more so. Here’s how to optimize your audio settings:
- Microphone Placement: Place your microphone close to your mouth, but out of the camera frame. Lavalier mics can be clipped to your clothing, while shotgun mics should be aimed directly at you.
- Audio Levels: Monitor your audio levels to ensure they’re neither too low nor too high. Aim for a consistent audio level that doesn’t peak into distortion.
- Audio Quality: Record your audio at the highest quality your equipment allows, typically in a WAV format. Avoid using compressed formats like MP3 during recording as they can degrade sound quality.
- Room Acoustics: Test your audio by recording a sample clip and listening to it with headphones. Make sure there’s no echo, background noise, or distortion. If needed, adjust the placement of your microphone or add more soundproofing.
- Backup Audio: Always have a backup audio recording. You can use a separate audio recorder, like the Zoom H5, to ensure you have a clean, secondary audio track in case something goes wrong with your primary recording.
Lighting Techniques for Clear, Professional Footage
Lighting is one of the most crucial aspects of video production. Proper lighting not only makes you look better on camera but also enhances the overall quality of your video.
- Natural Lighting: If you’re using natural light, shoot during the golden hours—early morning or late afternoon—when the sunlight is soft and warm. Position yourself facing the light source, ensuring that your face is well-lit without harsh shadows.
- Artificial Lighting: When using artificial lights, make sure they are positioned to reduce shadows on your face. Use softboxes or diffusers to create even lighting, and avoid direct, harsh light that can create unflattering shadows.
- Light Placement: Experiment with light placement. For instance, placing your key light at a 45-degree angle to your face and slightly above eye level can produce a flattering effect, while a fill light on the opposite side reduces shadows.
- Backlighting: Use a backlight to separate yourself from the background. This can prevent you from blending into the background and adds depth to the shot. A backlight is usually placed above and behind you.
Shooting Angles and Composition
The way you frame and compose your shots greatly affects how professional your video looks:
- Eye-Level Shots: Position your camera at eye level for a natural, engaging shot. This makes it feel like you’re speaking directly to your audience.
- Rule of Thirds: Use the rule of thirds to compose your shots. Divide your frame into a 3×3 grid, and place the most important elements (like your eyes) along the grid lines or where the lines intersect.
- Close-Ups and Medium Shots: Vary your shots to keep the video visually interesting. Use close-ups to highlight important points and medium shots to show your body language.
- Headroom and Lead Room: Ensure you have the right amount of headroom (space above your head) and lead room (space in front of your face if you’re looking off-camera). Too much or too little can make the shot look awkward.
- Depth of Field: If your camera allows, experiment with depth of field by adjusting the aperture. A shallow depth of field (where the background is blurred) can create a professional look and keep the focus on you.
Teleprompters and Cue Cards
If you’re working with a script, using a teleprompter or cue cards can help you stay on track without having to memorize every word:
- Teleprompters: A teleprompter displays your script on a screen in front of the camera lens, allowing you to read your lines while maintaining eye contact with the camera. This is great for delivering a polished performance. The Parrot Teleprompter or PromptSmart Pro are popular choices.
- Cue Cards: If you prefer a more informal approach, use cue cards with bullet points or key phrases. Place them near the camera so you can glance at them without breaking eye contact with the audience.
- Practice: Whether using a teleprompter or cue cards, practice reading your script beforehand to ensure a natural delivery. Avoid sounding robotic or overly rehearsed by varying your tone and pace.
7. Recording and Production.
Preparing for Recording Day
A well-organized recording session will save you time and reduce stress:
- Check Your Equipment: The day before shooting, double-check all your equipment. Ensure your camera batteries are charged, your memory cards are empty, and all cables are in working order.
- Set Up Your Space: Arrange your shooting environment the day before to minimize setup time on recording day. Check your lighting, audio, and camera angles to make sure everything is ready to go.
- Review Your Script: Go over your script one last time. Familiarize yourself with the content so you can deliver it smoothly and naturally.
- Rehearse: Do a full rehearsal with all equipment running. This helps you catch any potential issues with lighting, audio, or your delivery.
Recording Best Practices
When it’s time to record, follow these best practices for a smooth session:
- Stay Hydrated: Keep water nearby and take sips between takes to keep your voice clear.
- Dress Appropriately: Wear clothing that contrasts with your background but avoid patterns that might be distracting on camera. Solid colors often work best.
- Pace Yourself: Speak clearly and at a comfortable pace. Don’t rush through your content, and allow pauses for emphasis.
- Multiple Takes: Don’t hesitate to do multiple takes if necessary. It’s better to have more footage to work with in post-production than to realize you need to re-shoot later.
- Check Your Work: After each take, review the footage and audio. Make sure everything is clear, and that you’re happy with the delivery.
Handling Multiple Takes
During filming, you may need to do multiple takes to get the best results:
- Mark Your Takes: Use a clapperboard or simply clap your hands in front of the camera before each take to make it easier to distinguish between them in post-production.
- Label Your Files: After recording, label your video files clearly (e.g., “Lesson1_Take1”) to keep track of different takes and make editing easier.
- Stay Consistent: Try to maintain consistency between takes, especially if you need to stitch together parts of different takes in post-production. This includes your position, lighting, and audio settings.
Monitoring and Adjusting During Recording
As you record, stay aware of your environment and equipment:
- Live Monitoring: If possible, have a monitor or tablet set up so you can see yourself while filming. This allows you to make adjustments on the fly.
- Audio Monitoring: Wear headphones to monitor your audio in real-time. This helps you catch issues like background noise or mic interference as they happen.
- Make Adjustments: Don’t be afraid to pause and make adjustments if something isn’t right—whether it’s lighting, framing, or sound quality. It’s better to fix issues immediately rather than discovering them in post-production.
8. Post-Production Editing.
Incorporating Background Music and Sound Effects
- Volume Levels: Keep the background music volume low enough so that it doesn’t overpower your voice. Aim for a subtle enhancement rather than distraction. Adjust the volume to ensure your narration remains clear and understandable.
- Fading Music: Use fade-ins and fade-outs to smoothly introduce and exit your background music. This helps avoid abrupt starts or stops that can be jarring to the viewer.
- Sound Effects: Incorporate sound effects sparingly to emphasize key points or transitions. For example, a subtle “ding” sound can signal a new section or highlight an important piece of information. Ensure that the sound effects are relevant and do not distract from the content.
Color Correction and Grading
Color correction and grading can significantly improve the visual quality of your video, making it more appealing and professional:
- Color Correction: Start with basic color correction to ensure consistent brightness, contrast, and white balance across all your clips. Adjust the exposure, contrast, and white balance to create a uniform look throughout your video.
- Color Grading: After correcting colors, you can apply color grading to achieve a specific mood or style. For example, a warmer tone can make your video feel more inviting, while cooler tones can give a more modern, professional look. Tools like Adobe Premiere Pro and DaVinci Resolve offer advanced color grading options.
- Matching Footage: If you used multiple cameras or shot in different lighting conditions, use color grading to match the footage. This ensures consistency and helps maintain a professional appearance.
Adding Subtitles and Captions
Subtitles and captions improve accessibility and can enhance the viewer experience, especially for non-native speakers or those with hearing impairments:
- Why Add Subtitles?: Subtitles make your content accessible to a broader audience, including those who prefer reading along or watching videos on mute. They also improve SEO, as search engines can index subtitle text.
- Creating Subtitles: You can create subtitles manually using software like Adobe Premiere Pro, Final Cut Pro, or even YouTube’s subtitle editor. If you prefer automation, tools like Rev.com or Veed.io can generate subtitles for you.
- SRT Files: If you’re hosting your course on a platform that supports SRT files, consider uploading them. SRT files are standard subtitle formats that can be turned on or off by the viewer.
Reviewing and Finalizing Your Video
Before exporting your final video, it’s crucial to review it thoroughly:
- Watch Through: Watch the entire video from start to finish to catch any mistakes, such as typos in captions, awkward transitions, or audio issues.
- Get Feedback: If possible, have someone else review your video. Fresh eyes can catch issues you might have missed and provide valuable feedback on pacing, clarity, and engagement.
- Final Tweaks: Make any necessary adjustments based on your review and feedback. This could include refining edits, adjusting audio levels, or fine-tuning color grading.
Exporting Your Video
When you’re satisfied with your video, it’s time to export it:
- Choose the Right Format: Export your video in a format that’s compatible with your course platform. MP4 is a widely accepted format that offers a good balance between quality and file size.
- Resolution and Bitrate: Export your video in at least 1080p resolution to ensure a high-quality output. Adjust the bitrate settings to balance quality with file size. Higher bitrates provide better quality but result in larger files.
- Naming Convention: Use a clear and consistent naming convention for your files (e.g., “CourseName_Lesson1_Final.mp4”). This helps with organization and makes it easier to upload and manage your course content.
9. Uploading and Hosting Your Course..
Choosing a Platform
The platform you choose to host your online course will affect its reach, accessibility, and the overall experience for your students:
- Popular Platforms: Consider platforms like Teachable, Udemy, or Skillshare, which offer robust features and a built-in audience. These platforms handle the technical aspects of hosting, allowing you to focus on content creation.
- Self-Hosting: If you want more control over your course and the revenue, you might choose to self-host on your own website using tools like WordPress with LMS plugins (e.g., LearnDash or LifterLMS).
- Membership Sites: Consider using platforms like Kajabi or Thinkific, which allow you to create membership sites where students pay for access to your courses. These platforms also offer marketing tools, analytics, and other features to help you manage your courses.
Uploading Your Course Content
Once you’ve chosen a platform, you’ll need to upload your video content:
- File Organization: Organize your video files by lessons or modules before uploading. This will make it easier to manage and ensure that your content is presented in the correct order.
- Video Compression: If your platform has file size limitations, consider compressing your videos without sacrificing quality. Tools like HandBrake can help you reduce file sizes while maintaining high resolution.
- Testing: After uploading, test your videos on different devices (desktop, tablet, smartphone) to ensure they play correctly and that the quality is consistent across platforms.
Setting Up Course Structure
How you structure your course can significantly impact student engagement and comprehension:
- Modules and Lessons: Divide your course into modules and lessons. Each module should cover a broad topic, while individual lessons focus on specific aspects of that topic.
- Drip Content: Some platforms allow you to drip-feed content, releasing lessons on a set schedule. This can help maintain student engagement over time and prevent them from feeling overwhelmed.
- Quizzes and Assignments: Include quizzes, assignments, or interactive elements to reinforce learning and keep students engaged. These can also provide valuable feedback to help you improve your course.
SEO and Metadata
Optimizing your course for search engines is crucial to attract more students:
- Title and Description: Choose a clear, descriptive title for your course that includes relevant keywords. Write a compelling course description that highlights the benefits and what students will learn.
- Tags and Keywords: Use relevant tags and keywords in your course metadata. This helps search engines understand what your course is about and makes it easier for potential students to find it.
- Thumbnails and Images: Create eye-catching thumbnails and images that represent your course content. Use high-quality visuals that are relevant to the topic and include text overlays that highlight the course title or key points.
10. Marketing Your Online Course.
Continuous Improvement.
- Advanced Modules: Consider creating advanced modules or follow-up courses for students who want to continue learning. This not only provides additional value to your existing students but also opens up opportunities for repeat business and long-term engagement.
- Cross-Promotions: If you have multiple courses, cross-promote them within each course. For example, if you have a beginner course and an advanced course on the same topic, mention the advanced course at the end of the beginner course as the next step.
- Affiliate Programs: Establish an affiliate program to encourage others to promote your course. Offer a commission to affiliates for every student they refer who enrolls in your course. This can help expand your reach without upfront marketing costs.
11. Analyzing and Optimizing Performance
Tracking Course Metrics
Understanding how your course is performing is key to making informed decisions about future improvements:
- Enrollment Numbers: Track how many students have enrolled in your course. Compare these numbers to your goals and expectations to assess the effectiveness of your marketing and launch strategies.
- Completion Rates: Monitor how many students are completing your course. High dropout rates might indicate that some parts of the course are too challenging, too long, or not engaging enough.
- Student Engagement: Use analytics to see which lessons are most viewed, where students drop off, and how they interact with quizzes or assignments. This data can help you identify strong points in your course and areas that need improvement.
- Feedback and Reviews: Pay attention to student feedback and reviews. Positive feedback highlights what’s working well, while constructive criticism offers insights into what could be enhanced.
Optimizing Based on Feedback
Once you have data and feedback, use it to refine your course:
- Lesson Improvements: If certain lessons have low engagement or high dropout rates, consider revising them. This could involve shortening them, adding more visual aids, or breaking them into smaller sections.
- Content Updates: Keep your course content relevant by updating it regularly. This is especially important for subjects that change frequently, like technology or digital marketing.
- Adding Value: Based on student feedback, consider adding bonus materials, extra resources, or additional lessons that can enhance the learning experience.
Marketing Optimization
Continuous optimization of your marketing efforts can lead to increased visibility and higher enrollment rates:
- A/B Testing: Experiment with different marketing messages, email subject lines, and ad creatives to see what resonates best with your audience. Use A/B testing to make data-driven decisions.
- SEO Optimization: Regularly update your course title, description, and metadata to align with current SEO trends. Monitor keyword rankings and adjust your content accordingly to improve search engine visibility.
- Social Proof: Showcase testimonials, case studies, and success stories from your students on your course landing page and in marketing materials. Social proof can significantly influence potential students’ decision to enroll.
Expanding Your Reach
To further grow your audience and increase enrollments, consider expanding your reach through various channels:
- Guest Blogging and Podcasting: Write guest posts for popular blogs in your niche or appear on podcasts as a guest expert. This can help you reach new audiences and establish yourself as an authority in your field.
- Collaborations: Partner with influencers, industry experts, or other course creators for joint ventures or co-branded courses. Collaborations can expose your course to a broader audience.
- International Markets: If your course has the potential to reach global audiences, consider translating your content or providing subtitles in multiple languages. This can open up new markets and increase your student base.
Continuous Learning and Adaptation
The online learning landscape is constantly evolving, so it’s essential to stay updated with trends and best practices:
- Professional Development: Invest in your own learning by taking courses on instructional design, video production, or digital marketing. This will help you refine your skills and stay ahead of the competition.
- Networking: Join online communities or attend conferences related to online education. Networking with other course creators can provide valuable insights, inspiration, and opportunities for collaboration.
- Feedback Loop: Establish a continuous feedback loop with your students. Encourage them to share their thoughts throughout the course, and be open to making changes based on their suggestions.
12. Scaling Your Online Course Business
Building a Course Portfolio
Once you’ve established a successful course, consider expanding your offerings:
- Course Bundles: Package multiple courses together as a bundle at a discounted rate. This not only increases the perceived value but also encourages students to purchase more than one course.
- Specialization Tracks: Create specialization tracks or certification programs that include a series of related courses. This can appeal to students looking for more comprehensive learning paths.
- Subscription Models: Offer a subscription model where students pay a monthly or yearly fee for access to all your courses. This can provide a steady revenue stream and increase student retention.
Hiring a Team.
As your online course business grows, you may need to hire a team to manage various aspects:
- Content Creators: Bring on additional content creators to help produce new courses or update existing ones. This allows you to scale your course offerings without being overwhelmed by content creation.
- Marketing Professionals: Hire marketing experts to manage advertising campaigns, social media, and email marketing. A dedicated marketing team can help you reach more potential students and increase enrollments.
- Customer Support: As your student base grows, so will the need for customer support. Consider hiring support staff to handle inquiries, troubleshoot issues, and manage student relationships.
Automating Processes
Automation can help streamline your operations and free up time for strategic planning:
- Email Automation: Use email marketing software to automate onboarding sequences, promotional campaigns, and follow-up emails. Personalized automation can enhance student engagement and increase conversions.
- Course Delivery: Automate the delivery of course materials using learning management systems (LMS) that drip content or track student progress. This ensures a smooth learning experience without manual intervention.
- Analytics and Reporting: Set up automated reports to track key metrics like enrollments, revenue, and student performance. Regularly review these reports to identify trends and make data-driven decisions.
Exploring New Revenue Streams
Diversifying your income sources can create more stability for your business:
- Consulting and Coaching: Offer one-on-one consulting or coaching services related to your course topics. This can provide additional value to students who want personalized guidance and generate extra income.
- Corporate Training: Develop courses tailored for businesses and organizations. Corporate training programs can be lucrative, as companies often have larger budgets for employee education.
- Speaking Engagements and Workshops: Leverage your expertise by speaking at industry events, hosting workshops, or conducting live training sessions. These opportunities can boost your reputation and lead to new students.
Long-Term Vision and Goals
As you continue to scale, it’s essential to maintain a long-term vision for your online course business:
- Brand Building: Focus on building a strong brand that resonates with your target audience. Consistent messaging, quality content, and excellent customer service will help establish your brand as a leader in your niche.
- Sustainable Growth: While scaling is important, ensure that growth is sustainable. Avoid expanding too quickly or taking on too many projects at once. Focus on delivering quality and maintaining the integrity of your courses.
- Impact and Legacy: Consider the impact you want to make with your courses. Beyond revenue, think about how your courses can positively influence your students’ lives and contribute to your field. Building a legacy of excellence and positive change can be a powerful motivator.
Conclusion.
Creating, launching, and scaling an online course is a journey that requires dedication, creativity, and continuous learning.
By focusing on high-quality content, effective marketing, and a student-centered approach, you can build a successful online course business that not only provides value to your students but also offers you a fulfilling and sustainable career.
Remember, the key to long-term success is not just in the initial launch but in your ability to adapt, grow, and consistently deliver value.
Whether you’re just starting out or looking to scale your business, the strategies outlined in this guide will help you navigate the challenges and seize the opportunities that come your way.