

Every Excel user has at least one task they do over and over again – formatting a report, cleaning data, copying rows, sending emails, or generating a summary. Doing it manually once is fine. Doing it every single day or every Monday morning is a different story. That is exactly the problem Excel VBA Macros were built to solve.
VBA stands for Visual Basic for Applications. It is a programming language built directly inside Microsoft Excel – and every Excel user already has access to it, completely free. With VBA, you can record or write small programs (called Macros) that automate any Excel task in seconds.
This guide is written specifically for beginners. You do not need any coding background. By the time you finish reading, you will have written your first macro, understood VBA syntax, and discovered real-world automation examples that you can use immediately in your own work.
Section 1: What Is Excel VBA? What Is a Macro?
Before writing a single line of code, it is important to understand what VBA and Macros actually are – and how they are related.
A Macro is a saved sequence of Excel actions that can be replayed with a single click or keyboard shortcut. Think of it like a recording of your mouse clicks and keyboard inputs. Every time you play the macro, Excel repeats those actions automatically.
VBA (Visual Basic for Applications) is the programming language that powers those macros. When Excel records a macro, it writes VBA code behind the scenes. But you can also write VBA code manually – and this gives you far more power and flexibility than simple recording.
| Feature | Macro (Recorded) | VBA (Written Manually) |
| Ease of creation | Very easy – click Record | Requires learning basic syntax |
| Flexibility | Limited to exact recorded steps | Fully flexible – any logic possible |
| Can use IF/loops | No | Yes |
| Can interact with user | No | Yes (MsgBox, InputBox) |
| Can work across sheets | Limited | Yes, full control |
| Best for | Simple repetitive tasks | Complex automation workflows |
Key Insight: For truly powerful automation, you combine both approaches: record a macro to get the basic code skeleton, then edit the VBA manually to add logic, loops, and conditions.
Section 2: Setting Up Excel for VBA – Enable the Developer Tab
By default, the Developer tab is hidden in Excel. This tab is where all VBA and Macro tools live. Here is how to enable it:
Step 1: Open Excel Options
- Click File in the top-left corner of Excel.
- Select Options from the menu.
- The Excel Options dialog box will open.
Step 2: Enable the Developer Tab
- In the Excel Options dialog, click Customize Ribbon on the left panel.
- In the right panel, you will see a list of Main Tabs.
- Find Developer in the list and check the checkbox next to it.
- Click OK.
Result: The Developer tab now appears in your Excel ribbon between the View tab and any add-in tabs. You will use this tab for all macro and VBA work.
Step 3: Understand the Developer Tab Tools
| Tool | What It Does |
| Record Macro | Starts recording your Excel actions as VBA code |
| Stop Recording | Stops the recording and saves the macro |
| Macros | View, run, edit, or delete saved macros |
| Visual Basic | Opens the VBA Editor (the coding environment) |
| Macro Security | Controls which macros are allowed to run |
Section 3: The VBA Editor – Your Coding Workspace
The VBA Editor (also called the VBE) is where you write, read, and edit VBA code. To open it, press Alt + F11 from anywhere inside Excel. This keyboard shortcut works in all Excel versions.
The VBA Editor Has Three Main Areas:
- Project Explorer (left panel): Shows all open workbooks and their sheets, modules, and forms. This is like a file browser for your VBA project.
- Properties Window (below Project Explorer): Shows properties of the selected object, such as a sheet name or form control.
- Code Window (large right panel): This is where you write your VBA code. Each module or sheet opens its own code window.
Beginner Tip: Modules Most beginner macros are written inside a Module. To insert a new module, go to Insert > Module in the VBA Editor menu. A fresh, blank code window will appear ready for your code.
Section 4: Your First VBA Macro – Hello World Step by Step
The best way to learn VBA is to write code. Let us start with the simplest possible macro – one that shows a message box on screen. This one example will teach you the entire structure of a VBA macro.
- Step 1: Open the VBA Editor: Press Alt + F11. The VBA Editor opens.
- Step 2: Insert a Module: In the menu bar, click Insert, then click Module. A blank code window opens on the right.
Step 3: Write Your First Macro:
Type the following code exactly as shown:
Sub HelloWorld()
    MsgBox "Welcome to Excel VBA! You just wrote your first macro."
End Sub
Step 4: Run the Macro
Click anywhere inside the code you just wrote. Then press F5, or click the green Run button in the toolbar. A message box will pop up on your Excel screen with your message. Click OK to close it.
Congratulations! You just wrote and ran your first VBA macro. Let us break down what each line means so you understand the structure.
Understanding the Structure
| Code Line | What It Means |
| Sub HelloWorld() | Declares the start of a macro named HelloWorld. Sub is short for Subroutine. |
| MsgBox “…” | Displays a pop-up message box with the text inside the quotes. |
| End Sub | Marks the end of the macro. Every Sub must have a matching End Sub. |
Section 5: VBA Syntax Fundamentals – The Building Blocks
Now that you have written your first macro, it is time to learn the core building blocks of VBA syntax. These five concepts cover 90% of what beginners need to write real automation scripts.
1 – Variables: Storing Data Temporarily
Sub VariablesExample()
    Dim employeeName As String    ' Stores text
    Dim salary As Double          ' Stores decimal numbers
    Dim isActive As Boolean       ' Stores True or False
    Dim joiningYear As Integer    ' Stores whole numbers

    employeeName = "Ravi Sharma"
    salary = 45000.50
    isActive = True
    joiningYear = 2021

    MsgBox employeeName & " joined in " & joiningYear
End Sub| Data Type | Used For | Example Value |
| String | Text and names | “Priya Mehta” |
| Integer | Whole numbers up to 32,767 | 42 |
| Long | Large whole numbers | 1000000 |
| Double | Decimal numbers | 3.14159 |
| Boolean | True or False only | True |
| Date | Date values | #01/25/2024# |
| Variant | Any data type (flexible but slower) | Anything |
2 – IF Statements: Making Decisions
IF statements let your macro make decisions based on conditions. The structure is very readable:
Sub CheckSalary()
    Dim salary As Double
    salary = 38000

    If salary >= 50000 Then
        MsgBox "Senior level salary"
    ElseIf salary >= 30000 Then
        MsgBox "Mid level salary"
    Else
        MsgBox "Junior level salary"
    End If
End Sub
3 – Loops: Repeating Actions
Loops are the most powerful tool for automation – they let your macro repeat the same action for hundreds or thousands of rows with a single piece of code.
For…Next Loop – use when you know exactly how many times to repeat:
Sub ForLoopExample()
    Dim i As Integer
    For i = 1 To 10
        Cells(i, 1).Value = "Row " & i   ' Writes text into column A
    Next i
End Sub
Do While Loop – use when you want to repeat until a condition is met:
Sub DoWhileExample()
    Dim row As Integer
    row = 2
    Do While Cells(row, 1).Value <> ""
        Cells(row, 3).Value = Cells(row, 1).Value & " - Processed"
        row = row + 1
    Loop
End Sub
4 – Working with Cells and Ranges
Most VBA macros work directly with Excel cells. There are two ways to reference cells in VBA:
' Method 1: Range (most readable)
Range("A1").Value = "Hello"          ' Write a value
Range("A1:A10").ClearContents        ' Clear a range
Range("B2").Font.Bold = True          ' Make bold

' Method 2: Cells(row, column) - best inside loops
Cells(1, 1).Value = "Row 1, Col 1"   ' Same as A1
Cells(2, 3).Interior.Color = vbYellow ' Highlight C2 yellow
5 – MsgBox and InputBox: Communicating with the User.
MsgBox shows information to the user. InputBox asks the user to type something in. These two functions make your macros interactive.
Sub InteractiveMacro()
    Dim userName As String
    userName = InputBox("Please enter your name:", "Welcome")

    If userName = "" Then
        MsgBox "No name entered. Macro cancelled.", vbExclamation
    Else
        MsgBox "Hello, " & userName & "! Your report is ready.", vbInformation
    End If
End Sub
Section 6: Real-World VBA Macro Examples
Theory becomes truly useful when applied to real problems. Here are five practical macro examples that address the most common automation needs in professional Excel work.
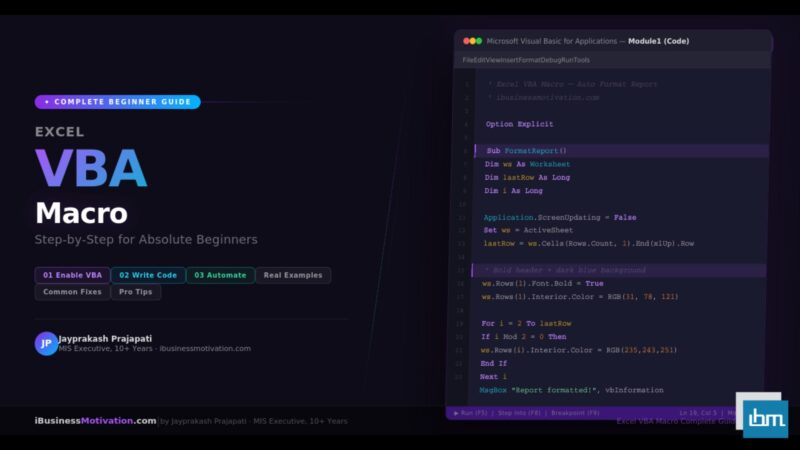
Example 1: Auto-Format a Report with One Click
This macro formats your data range with bold headers, auto-fit columns, alternating row colors, and a border – turning a raw data dump into a professional report in seconds.
Sub FormatReport()
    Dim ws As Worksheet
    Dim lastRow As Long, lastCol As Long
    Dim i As Long

    Set ws = ActiveSheet
    lastRow = ws.Cells(ws.Rows.Count, 1).End(xlUp).Row
    lastCol = ws.Cells(1, ws.Columns.Count).End(xlToLeft).Column

    ' Bold and color the header row
    ws.Rows(1).Font.Bold = True
    ws.Rows(1).Interior.Color = RGB(31, 78, 121)   ' Dark blue
    ws.Rows(1).Font.Color = RGB(255, 255, 255)      ' White text

    ' Alternating row colors
    For i = 2 To lastRow
        If i Mod 2 = 0 Then
            ws.Rows(i).Interior.Color = RGB(235, 243, 251)  ' Light blue
        Else
            ws.Rows(i).Interior.Color = RGB(255, 255, 255)  ' White
        End If
    Next i

    ' Auto-fit all columns
    ws.Columns.AutoFit

    MsgBox "Report formatted successfully!", vbInformation
End Sub
Example 2: Remove Duplicate Rows Automatically
This macro finds and deletes duplicate rows based on column A, looping from the bottom up to avoid skipping rows during deletion.
Sub RemoveDuplicates()
    Dim ws As Worksheet
    Dim lastRow As Long
    Dim i As Long
    Dim checkValue As String

    Set ws = ActiveSheet
    lastRow = ws.Cells(ws.Rows.Count, 1).End(xlUp).Row

    ' Loop from bottom to top to safely delete rows
    For i = lastRow To 2 Step -1
        checkValue = ws.Cells(i, 1).Value
        If Application.CountIf(ws.Range("A1:A" & (i-1)), checkValue) > 0 Then
            ws.Rows(i).Delete
        End If
    Next i

    MsgBox "Duplicates removed. Rows remaining: " & _
           ws.Cells(ws.Rows.Count, 1).End(xlUp).Row - 1, vbInformation
End Sub
Example 3: Copy Data to a New Sheet Based on a Condition
This macro reads through all rows and copies any row where the Region column says ‘North’ to a separate sheet named NorthData. This is the browser-based equivalent of the Excel Worksheet Split Tool – fully automated inside your workbook.
Sub FilterToNewSheet()
    Dim srcWs As Worksheet, destWs As Worksheet
    Dim lastRow As Long, destRow As Long
    Dim i As Long

    Set srcWs = Sheets("MasterData")
    ' Create destination sheet if it does not exist
    On Error Resume Next
    Set destWs = Sheets("NorthData")
    On Error GoTo 0
    If destWs Is Nothing Then
        Set destWs = Sheets.Add(After:=Sheets(Sheets.Count))
        destWs.Name = "NorthData"
    End If
    destWs.Cells.ClearContents

    ' Copy header row
    srcWs.Rows(1).Copy destWs.Rows(1)
    destRow = 2
    lastRow = srcWs.Cells(srcWs.Rows.Count, 1).End(xlUp).Row

    ' Copy rows where column C = North
    For i = 2 To lastRow
        If srcWs.Cells(i, 3).Value = "North" Then
            srcWs.Rows(i).Copy destWs.Rows(destRow)
            destRow = destRow + 1
        End If
    Next i

    MsgBox "North region data copied. " & (destRow - 2) & " rows transferred.", vbInformation
End Sub
Example 4: Auto-Generate a Summary Report
This macro calculates the total and average salary by department and writes a summary to a new sheet – a task that would take 15+ minutes manually, done in 3 seconds automatically.
Sub GenerateSummary()
    Dim ws As Worksheet, sumWs As Worksheet
    Dim lastRow As Long, i As Long
    Dim dept As String

    Set ws = Sheets("EmployeeData")
    lastRow = ws.Cells(ws.Rows.Count, 1).End(xlUp).Row

    ' Setup summary sheet
    On Error Resume Next: Sheets("Summary").Delete: On Error GoTo 0
    Set sumWs = Sheets.Add(After:=Sheets(Sheets.Count))
    sumWs.Name = "Summary"

    ' Headers
    sumWs.Range("A1").Value = "Department"
    sumWs.Range("B1").Value = "Total Salary"
    sumWs.Range("C1").Value = "Average Salary"
    sumWs.Range("D1").Value = "Headcount"
    sumWs.Rows(1).Font.Bold = True

    ' Get unique departments and compute values
    Dim depts As New Collection
    On Error Resume Next
    For i = 2 To lastRow
        depts.Add ws.Cells(i, 2).Value, ws.Cells(i, 2).Value
    Next i
    On Error GoTo 0

    Dim r As Integer: r = 2
    Dim d As Variant
    For Each d In depts
        sumWs.Cells(r, 1).Value = d
        sumWs.Cells(r, 2).Value = Application.SumIf(ws.Range("B2:B" & lastRow), d, ws.Range("C2:C" & lastRow))
        sumWs.Cells(r, 3).Value = Application.AverageIf(ws.Range("B2:B" & lastRow), d, ws.Range("C2:C" & lastRow))
        sumWs.Cells(r, 4).Value = Application.CountIf(ws.Range("B2:B" & lastRow), d)
        r = r + 1
    Next d
    sumWs.Columns.AutoFit
    MsgBox "Summary report generated on the 'Summary' sheet!", vbInformation
End Sub
Example 5: Save Each Sheet as a Separate Workbook
This macro loops through all sheets in a workbook and saves each one as a separate Excel file – perfect for sending individual regional or department reports.
Sub SaveSheetsAsFiles()
    Dim ws As Worksheet
    Dim savePath As String
    savePath = Environ("USERPROFILE") & "\Desktop\Reports\"

    ' Create folder if needed
    If Dir(savePath, vbDirectory) = "" Then MkDir savePath

    Application.ScreenUpdating = False
For Each ws In ThisWorkbook.Sheets
        ws.Copy
        ActiveWorkbook.SaveAs savePath & ws.Name & ".xlsx", xlOpenXMLWorkbook
        ActiveWorkbook.Close False
    Next ws
    Application.ScreenUpdating = True

    MsgBox "All sheets saved to: " & savePath, vbInformation
End Sub
Section 7: Common Beginner Mistakes and How to Fix Them
Every VBA beginner runs into the same set of errors. Here are the most common ones – and exactly how to fix them.
| Mistake | Why It Happens | How to Fix It |
| Run-time error 1004: Application-defined error | Sheet name does not match, or referenced range is empty | Check sheet names with exact spelling and check that data exists in the range |
| Variable not defined (Compile Error) | Option Explicit is on but variable was not declared with Dim | Always declare variables with Dim before using them |
| Macro runs but nothing changes | Code references a different sheet than the active one | Always use Set ws = Sheets(“SheetName”) to explicitly target the right sheet |
| Infinite loop – Excel freezes | Do While loop condition never becomes False | Add a safety counter: if counter > 10000 then Exit Do |
| Wrong row deleted – data skipped | Looping top-to-bottom while deleting rows | Always loop from the last row to the first (Step -1) when deleting |
| Macro runs but shows no result | MsgBox is missing or result is written to wrong cell | Add MsgBox at the end to confirm execution and print result to a known cell |
| Cannot run macro – security warning | Macro security setting is set to Disable All Macros | Go to Developer > Macro Security > Enable All Macros or select the trusted document option |
Always Save a Backup Before Running Macros: Macros that delete rows, clear data, or save files cannot always be undone with Ctrl+Z. Always save a copy of your workbook before running a new macro for the first time.
Section 8: How to Assign a Macro to a Button
Running a macro from the VBA Editor is fine for testing. But for daily use, assigning it to a button makes your automation truly one-click accessible for anyone.
Step-by-Step: Add a Macro Button to Your Sheet
- Go to the Developer tab in the Excel ribbon.
- Click Insert in the Controls group.
- Under Form Controls, click the Button icon (top-left in the list).
- Draw the button on your sheet by clicking and dragging.
- The Assign Macro dialog will appear immediately after you draw the button.
- Select your macro from the list and click OK.
- Right-click the button and select Edit Text to rename it (e.g., ‘Format Report’, ‘Remove Duplicates‘).
- Click outside the button. Now clicking it will run your macro instantly.
Alternative: Keyboard Shortcut: You can also assign a keyboard shortcut to any macro. Go to Developer > Macros, select your macro, click Options, and set a shortcut key (e.g., Ctrl+Shift+R). This works anywhere in the workbook without needing a button.
Section 9: Saving Workbooks with Macros – The .xlsm Format
This is one of the most important things beginners forget: if your workbook contains VBA macros, you must save it in the Excel Macro-Enabled Workbook format (.xlsm). If you save as the standard .xlsx format, Excel will delete all your macro code.
How to Save as .xlsm:
- Press Ctrl+Shift+S (Save As) or go to File > Save As.
- In the Save As Type dropdown, select Excel Macro-Enabled Workbook (*.xlsm).
- Click Save.
| File Format | Extension | Saves Macros? | Use When |
| Excel Workbook | .xlsx | No – macros are deleted | No macros in the file |
| Excel Macro-Enabled Workbook | .xlsm | Yes | File contains VBA macros |
| Excel Binary Workbook | .xlsb | Yes | Large files, faster performance |
| Excel 97-2003 Workbook | .xls | Yes | Sharing with very old Excel versions |
Section 10: 10 Pro Tips for Writing Better VBA Macros
- Always add Option Explicit at the very top of every module. This forces you to declare all variables, which prevents typos from creating silent bugs.
- Use Application.ScreenUpdating = False at the start of a macro and True at the end. This stops the screen from flashing during execution and makes macros run 5-10x faster.
- Add Application.Calculation = xlCalculationManual before heavy loops and set it back to xlCalculationAutomatic at the end to prevent Excel from recalculating formulas after every cell change.
- Always use explicit sheet references (Set ws = Sheets(“Name”)) instead of relying on ActiveSheet. This prevents your macro from running on the wrong sheet.
- Use With…End With blocks when setting multiple properties of the same object to reduce repetition and improve readability.
- Write comments in your code using an apostrophe ( ‘ ) to explain what each section does. Your future self will thank you.
- Use Err.Number and On Error GoTo to handle errors gracefully instead of letting your macro crash mid-execution.
- Always find the last row dynamically using Cells(Rows.Count, 1).End(xlUp).Row instead of hardcoding a row number like 1000.
- Test your macro on a small 10-row sample before running it on thousands of rows. It is much easier to fix mistakes on small data.
- Keep each macro focused on one task. Instead of one 200-line macro that does everything, write five 40-line macros and call them from a master macro using Call MacroName.
Frequently Asked Questions About Excel VBA Macros
Not to get started. The Record Macro feature generates VBA code automatically with zero programming knowledge. As you grow more comfortable, you can start editing the recorded code, then eventually write macros from scratch. The learning curve is gentle for beginners.
Yes, if they open the same .xlsm file, the macros travel with it. However, the other person may need to enable macros when they open the file. Macro security settings are configured per-computer, not per-file.
Yes. Excel VBA can control Word, Outlook, PowerPoint, and Access using a technique called Automation. For example, you can write a macro that reads data from Excel and automatically sends personalized emails through Outlook – one email per row of data.
They are closely related but not identical. A Macro is the recorded action. VBA is the programming language that runs behind the macro. All Excel macros are written in VBA, but not all VBA code needs to come from a recorded macro – you can write it directly.
Generally no. VBA has been supported in Excel since Excel 97 and Microsoft continues to maintain backward compatibility. However, some deprecated functions may produce warnings in newer versions. Browser-based tools and Python are better choices for cross-platform or cross-version automation needs.
Press F8 inside the VBA Editor to step through your code one line at a time. Hover your mouse over variables to see their current value. Use Debug.Print variableName to print values to the Immediate Window (View > Immediate Window). These three techniques solve 95% of beginner debugging problems.
Yes. VBA can connect to SQL Server, Access databases, CSV files, and even web pages using techniques like ADO (ActiveX Data Objects) and web queries. These are intermediate to advanced topics, but they are well within reach once you are comfortable with the basics covered in this guide.
Summary: Your VBA Macro Learning Roadmap
You have covered a lot of ground in this guide. Here is a clear recap of what you now know – and what to focus on next as you continue learning.
| Stage | What You Learned | Next Action |
| Beginner | Enable Developer tab, open VBA Editor, write first macro | Practice MsgBox, InputBox, and simple loops |
| Beginner+ | Variables, data types, IF statements, basic loops | Write a macro to format your own report |
| Intermediate | Work with cells, ranges, multiple sheets, real examples | Automate one repetitive task from your actual job |
| Intermediate+ | Error handling, buttons, .xlsm saving, screen updating | Build a macro that processes 100+ rows of data |
| Advanced | Cross-sheet automation, saving files, summary reports | Connect VBA to Outlook or other Office apps |
The most important step is not reading – it is doing. Open Excel right now, press Alt+F11, and write your first macro. Even if it is just a MsgBox that says your name. The habit of opening the VBA Editor is the first step in becoming an Excel automation expert.
Free Excel Tools at ibusinessmotivation.com: If you need browser-based automation without writing any code, visit ibusinessmotivation.com for free tools including Multiple Excel File Merger, Excel Data Cleaner, and Excel Worksheet Split Tool. These tools automate the same tasks covered in this guide – no VBA required.